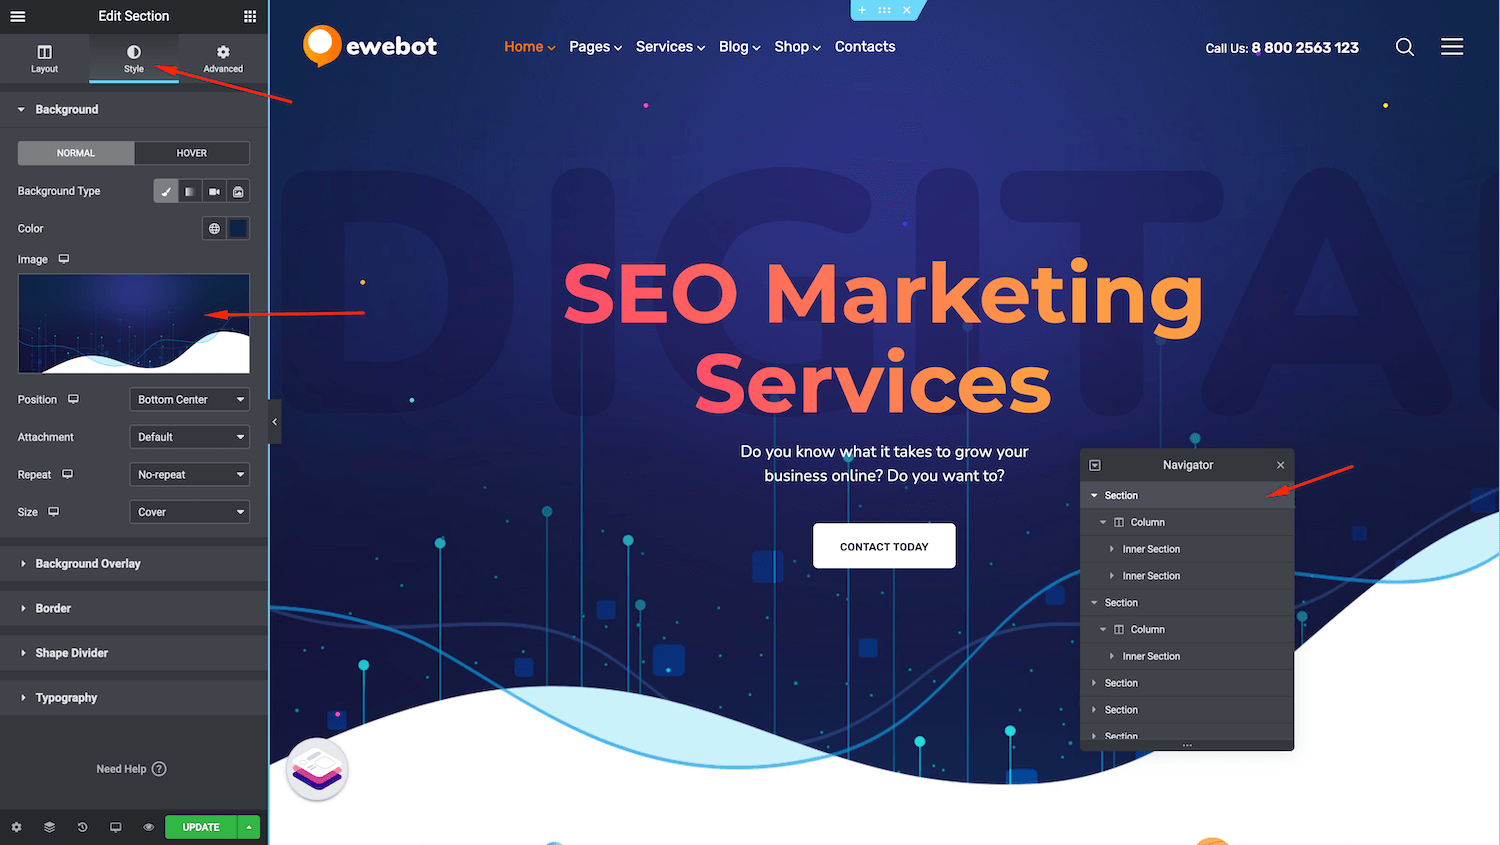
Navigator in Elementor
Having trouble locating elements in Elementor?
There is a useful feature that will help you finding and modifying certain elements in the theme builder.
Navigator is a tree panel providing easy access to every element on the editor.
There are 3 ways to enable navigator in Elementor:
1. Right-click any element and then click on Navigator.
2. Click on the elements button in the panel’s footer.
3. Use the Cmd/Ctrl + I keyboard shortcut.

Now you can go through all the sections available in Navigator panel to find the one you need.
By clicking the arrow on the section you will open it up and see the inside elements: columns, then modules, etc.
If you get lost and can’t understand which section you are on, use the View button (eye-shaped-icon) to hide the section for a moment and see what section disappears from the page.
Do not worry, this will not affect the front end of your website but will let you focus on a specific section while editing.

Background elements
Once the Navigator is enabled and you have definitely found the section to edit but still can’t locate some background elements in the module settings, go back to the section and switch to the Style tab. The background elements are usually assigned to the main section and can be modified in the Style tab of this section